Pages

Wednesday, 27 April 2011

What's on your workdesk? Wednesday?99


Well, nothing really, thats why I am showing you my whole work space as it will give you more to peruse! If you scroll down my blog, you will see that I have been very busy with 2 rather important gifts. One for my fathers 70th (the tutorial on telephone directory grunge) and the other for my Hubby's 40th! (the medal frame)

The Tim Holtz idea-ology over the back of my char is the limited edition CHA bag I won in a lucky draw at the recent convention I attended with Tim, so I hang it over the back of my chair for inspiration....

This great desk hop is hosted by Julia over at Stamping Ground. Come and join the fun!
Belina

Monday, 25 April 2011

Alcohol Ink frame


Hi fellow inky friends

Well I have been wracking my brain for a gift for my Hubby for his 40th. The answer presented itself to me last night in the form of some beaten up frames I bought at a sidewalk sale. My Hubby is a cyclist and has a ton of medals, just lying in his cupboard. So I decided to make him 3 frames to house them. One for road races, one for mountain, and one for the biggest timed race in the southern hemisphere, the ARGUS CYCLE TOUR, he did his tenth one this year. So far I have done one...at 2.5 hours per frame, I better get moving!

First I cut some Gadget Gears and stuck them to the frame and backboard, then I took my sticky backed foil and tore it up and stuck it all over the frame.


I cut the foil at the join and took the frame appart. Using alcohol ink (pitch black) I covered the frame and the board and sanded them, hot glued the medals in place and put the frame back together. Hay presto, part one of 3 done!

Friday, 22 April 2011

Tutorial on Grunge Style tin, box or tray


Lesley asked me for a tutorial on how I did the telephone directory grunge on my tins, trays and boxes, well here goes... I took tons of photos, so be warned this is a photo heavy entry!

you need:
your item to cover (more than one is good to be able to do a "factory line" of tops, sides and edges...)
craft/wood or cold glue (the white stuff that dries clear)
Paint brush
torn up telephone directory or dictionary (we don't have those in our second hand stores so I use telephone directory...)
craft mat
distress ink of your choice (I like Walnut Stain)
clear varnish spray can
Pratley Glo (2 part resin of your choice as used for decoupage)

Instructions:

Paint a portion of your object with the glue. stick on your first piece of torn paper. Using your glue brush, go over the paper, add your next piece by slightly overlapping the first one and continue in this manner till the whole object is covered. If your object has an opening, paper right over it as you can cut it open again later. Also paper right off the edges of the bottom of your object, this will be sanded off later.


I use clip art to decorate my items which I print on my inkjet and take to the photocopy shop to copy for me so that the glue does not deteriorate the image. I also decorate with Archival inked stamps in some cases, but did not for this project.

Cut your clip art out and glue in place by putting a layer of glue down first, then your paper then another layer of glue over the top to seal it.

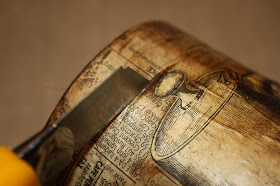
Once it is dry to the touch you can start inking with the distress ink color of your choice. I like the look I get when I go over an area where the glue is still wet under the paper, it makes the distress ink react and gives you more variation in color. You can see this in the photo below where it has gone golden brown. The very dark brown is where there was NO glue and the ink has soaked into the paper.

After inking your object, cut the openings with a craft knife as I did for the tin below.

Take your project outside or into a well ventilated area and give it a good coat of clear spay varnish. (have not done this so there is no photo...)

For items with flat surfaces, I like to add Pratley Glo, this is a 2 part resin that you mix and pour onto the object. (follow the instructions on the box) Make sure you are working on a level surface as this stuff will level itself out and if your object had no sides, it will flow off and onto your work surface! (this is experience talking, get a spirit level if you are not sure and test.) Put a box over your project or suspend a tray on mugs over your item to stop dust settling on it as it stays sticky for 12 hours. (Do not be tempted to open and touch it before that as it will get permanent finger prints!)

I like to finish my trays off with cork underneath. I buy this from the same place that I get my decoupage blanks.

Thursday, 21 April 2011

Grungy Monday 04


This is my entry for the Grungy Monday challenge 04 with Texture Fades and Distress over at Studio L3 it is open till Sunday 24 April. They even have a video link so that you can see first hand from Tim (aka HRH - a term I pcked up from Kazz's blog) himself how to do this technique.

I must say that I had such fun with this tag. I cut it with the Sizzex Tag die and then embossed it using the distress ink inside the folder before embossing it. (as per the video)

Then I cut a rosette and sprayed it with Denim color wash and spritzed it with Perfect Pearl Mist. I punched a MS cupcake and put it on the circle I punched and edge distressed for the centre of the rosette.

I used the Denim Distress Stain to ink up the 3 small flowers and the hessian one as well as the embroidery englase ribbon. I made my own happy birthday stamp (with the Teresa Collins Stamp maker) to fit the ticket die and tucked it under the rosette.

I added the tissue tape to the bottom of the tag and finished it off with the bling for the flowers and the ribbon for the top.

It is amaizing how these tags just come together, like they have a mind of their own as I am creating. I just do, I don't think, HRH says that thinking is overrated! He is so right!

I hope you enjoyed this one with me, I think I will give it to my dad for his 70th next Saturday.

Bella


Wednesday, 20 April 2011

What's on your workdesk? Wednesday?98


How does Wednesday come round so fast? This is where all the fun happens, so join in over at http://stamping-ground.blogspot.com Well my desk is full of ink and tags! I should be doing my next LO for the class I am teaching, but I am somewhat sidetracked at the moment by all the goodies I got at the convention 2 weeks ago. Wow, I can't really believe it was 2 weeks ago...

Ok, so here is my Cuttlebug, soon to be usurped by a BOND, VAGAbond! (don't tell the bug!) I hope, they have finally arrived in South Africa and I am trying to get my inky paws on one!

I am busy with a few tags for Grungy Monday so am trying out a few things here....I do clear my desk every now and then I promise, but somehow as I work, things seem to close in on me! When I see it like this, I don't know how I manage, but I guess I created this mess so have to live with it!

Tuesday, 19 April 2011

Tim inspired Tags

I have entered this tag above in the Simon Says stamp challenge please click on the blue text for a link to find out more. The base is Color wash with tissue tape and then I cut a rosette, inked it with distress ink and added perfect pearls, then I stamped it with the music stamp. I added distress ink to the flower and sprayed it with water to disperse it. Put tissue tape on the button and poked the gold string through. I die cut the bird, covered it with crackle paint and then added some gold alcohol ink to the cracks. Stamped the Memories are stitched with love stamp to a punched out circle and finished off the rosette.


Well the sun is shining in Cape Town, South Africa today and there is no wind so I could take my tags outside for a photo shoot!!! Usually I would be chasing them round the garden as our South Easter can really give things wings!


Reach for the Stars


This is a tag I made with some of my new stash. I cut the tag using the die and then sprayed it with colour wash, but while it was still wet I added some perfect pearl mist and it reacted beautifully with the colour wash.

I stamped the rocket which is a Bo-Bunny image onto the sticky backed foil which I had adhered to some card stock. cut it out and ran it through the Cuttlebug to emboss it. I then added a small punched circle for the window.

I cut the lettering from Tim's Vintage Market and Chipblock fonts and used the silver paint dabber to colour them.

The stars and swoosh are also from the same stamp set as the rocket and I used the paint dabber to ink them up. I filled them with crystal stickles and then wrote with the stickles and outlined it with my signo silver pen.


lastly I stickled the Soar ticket and added that and the ribbon.

This was such fun to make.

Thursday, 14 April 2011

Distress Butterfly Tag


I have finally had a chance to sit down and play with my stash. To think this time last week I was counting the sleeps to the Scrapbook convention, now I am fighting sleep to be able to create!


Here is the tag I did this afternoon.


I used Espresso color wash over the masks.


For the butterfly I put the perfect pearls all over the wings using the pp ink pad and the sunflower yellow perfect pearls, glued on the top shape and inked with clear embossing ink and covered with clear embossing powder to get the glossy wings. In this photo you can see that the baby wing has not been embossed yet.

I coloured the body black and inked up the leaf die cut from sizzex tattered leaves. Drew the feelers and legs onto the leaf and stuck the butterfly down. I die cut a strip of tags and stamped the just a note (which I designed and made using the Teresa Collins stamp maker) with Coffee Archival ink then covered it in peeled paint Distress ink, poured the clear embossing powder on thickly, embossed from below and then cracked it as it cooled and added walnut stain distress ink into the cracks. Finally I distressed the edge of the tag, added clear embossing ink and perfect pearls sunflower yellow to finish it off.

Wednesday, 13 April 2011

What's on your workdesk? Wednesday?


I found this idea over at http://neelzexpressionz.blogspot.com/ so I went on to Stamping Ground http://stamping-ground.blogspot.com/ where they host this day. I thought it was such a fun idea and wanted to join in...

So here is what is on my desk: TOTAL CHAOS! After coming home from the Scrapbook Convention with Tim and Margie, I am still unpacking my stash and my gifts. I bought some Alterations dies (piled up on the left under the limited edition bag I was lucky enough to win) and was given some (in that yummy box on the right) more along with the distress stains, the perfect pearl mists and color washes...as you can see by my storage above my desk, I am going to have to re-arrange a few things to have them really handy. Then there is the bag of creative goodness supplied by Tim for his Journal class which has to be unpacked and homes found for the various products. *happy sigh* maybe this time next week there will be some projects to show...

Tuesday, 12 April 2011

My gifts to Tim, Mario, Margie, Glenda and Lynn


I decided that I should make each important person at this convention a gift. Knowing how Tim and Mario just LOVE their Starbucks, I decided to do them a matching set. I made Tim a tray and Mario a tin to store his travel stash of Starbucks sachets.
In both cases I covered them with torn telephone directory. Inked them up with Walnut distress ink and added the images.

For the tray: I used an ancient clip art for the coffee set and got the Starbucks logo off the net. Printed it out and cut the handle of the jug so that I could slide the logo under it. I used a glass and stood it on the tray and dribbled the Latte alcohol ink round it to look like a coffee mark. I place the metal charms where I wanted them and added the Pratley Glo two part resin layer on the top.

For the Tin: I stuck on the Logo and added the metal charm crown. Stamped the Zebra and the flag. Colored the flag with distress inks and drew in our iconic Table Mountain with the new Soccer Stadium and a tree for the Zebra to stand under, for fun I also added the moc coffee stain to the tin with Latte alcohol ink. I also added a layer of the two part resin to the top. Inside I glued a piece of velvet leopard print (cos we are in Africa after all) and adhere the tissue tape round the sides. I used a glue gun to adhere the ribbon, lock and hinges which were from my grunge board stash.


I painted Margie's and Glenda's pink roses with traditional artists acrylics on 12"x12" box canvases. These I did by just looking through a coffee table book of roses and copied a bit of this one and a bit of that one. I don't draw first I just make it up as the mood takes me. You can see they are quite different, done on different days.


Lynn's blue rose I painted at the convention using paint dabbers on Claudine Hellmuth's sticky backed canvas. This was great fun, cos you can just use the dabbers like paint brushes, only this time I had no photos to look at and winged it!


Monday, 11 April 2011

SA Scrapbook Convention with Tim Holtz and Margie Romney-Aslett


Wow, hours flew by at the speed of light. Why is it that this happens when you are having fun and want it to last for ever?

We started with Margie's classes then we did Tim's. I am going to slowly add the projects to this blog as and when I get a few minutes of time to myself...but for now here is Tim's journal project.


But first a moment to make some of you a bit green....

In September last year I bid (and won!) at an auction fundraiser for a home that rehabilitates street children (the Homestead http://www.homestead.org.za ), to have dinner with Tim, Mario and Margie.

After a day of creative goodness, we dined in the treetops on a beautiful balmy autumn evening at a renowned restaurant called Moyo http://www.moyo.co.za/ but before you get too green, it was with a whole lot of other people too, like the convention organizer Glenda and her team of merry helpers!

In the photos below, the lady from Moyo is painting their faces with white clay in a seres of dots, some larger than others, in Mario's case...as this is an African tradition. So while in Africa, do as we do!

I had to keep pinching myself to make sure that I was not dreaming! I sat next to Mario who is so charming and such a gentleman, opposite Tim and Margie who where quite entertaining, regaling us with their antics at the hotel in Johannesburg and the game lodge called Kichaka! (see Tim's blog for photos http://timholtz.typepad.com)

The photos below are the view of the tables below us, our table with my gifts to Tim, Mario, Margie, Glenda and Lynn (more about those later) and the beautiful light above us.

It felt like in no time at all, dinner was over and it was nearly midnight so time to head back to the hotel, but I got the pleasure of their esteemed company for breakfast the next morning before they had to pack their bags to head back home to the USA. I really admire them for taking the 40+ hour trip it currently takes to get here and then again back home! Hopefully next time they will be able to get a direct flight!

Below is breakfast at the hotel before departing our separate ways. *sigh*


Friday, 8 April 2011

Off to meet TIM himself!


Well, when I received a tweet from a friend just now reminding me to breath, just breath, I realized that 6 months of waiting for this day is finally arriving tomorrow!

Tim and Mario are in Cape Town and running a class at the SA Scrapbook Convention tomorrow morning. I am going to be up at sparrows cos registration is at 6am and I live an hours drive away...for those who know me well locally, they have been asking what I am going to wear and is my camera charged...my camera is always charged and in my hand as an extension of me and as for my clothes, well, now that is an interesting question as I usually could not be bothered... The venue is notoriously air conditioned and you either cook or freeze so I will be doing my onion impersonation with many layers! Now layers of what, I am yet to choose, so best I get off this computer which is such a thief of time and get packing.

I will also be having dinner with the convention organizers and lecturers tomorrow night, so watch this space...

I hope to be tweeting and posting pics if I can. SA is not known for its speed of light techno communication!

till Sunday then...


Wednesday, 6 April 2011

BLING!


I was invited over to this site and just love the fact that it is my namesake - How cool is that?!


There is a make your own bling challenge over at: http://bellacreations.ning.com

APRIL BELLA UNIQUE CHALLENGE

So I thought I would enter this tin that I did with Distress inks and torn up telephone directory...

First you use craft or wood glue to glue down the torn strips, then when it is dry you ink it with the distress inks. I like the Walnut stain, but you can use any color. I then stamped on the clock and swirls and glued on the bling through a stencil I made from an old Prima bling that I could no longer get hold of here in South Africa.

To make the stencil, all I did was scan my bling and enlarge it and then punch out the dots where the bling needed to go. This way you can either mark your project and glue the bling on later or work through your stencil with Liquid Pearls or Stickles. I used Liquid pearls through my stencil on the page below.


Tuesday, 5 April 2011

What I did with those ticket strips


Well, I got out my alcohol inks and dabbed the background, ran it though my embossing folder, then dragged the black paint dabber over the top. I added the ticket on pop dots and then stamped a butterfly on some packaging with archival ink, as per Tim's idea for a tag a while ago and added it to the card by folding the wings and gluing the body down.


For this card I alcohol inked the background stamped the wording and the butterfly with archival ink and then added the tickets on pop dots.

I made my own ticket stamps for the just a note and thank you, using the Stampmaker by Theresa Collins.