Pages

Wednesday, 25 June 2014

Whats on My Workdesk Wednesday 264? Trial runs

Hello fellow Desker from Julia's place over at Stamping Ground.  Welcome to my desk in Cape Town, South Africa.

I have been very Steam punk inspired lately and am busy with some trial run stuff on a grand scale...hence the cog and ceiling tile balancing (precariously I see) on a polystyrene cornice...I need to work out costs and time taken to make these things as I have to do a quote.  Where are the admin fairies for this?  Art is fun.  Quoting is not. Its scary stuff!

Here are the 3 ATCs I have received in the last 2 weeks from our WOYWW 5 birthday swap.  I am still waiting for 1 that I am aware of.  Receiving these in the post has been like mini Christmases in my post box.  So nice to have a happy surprise when I open it!
Thank you Debbie, Kim Young and Robyn for my treasures.

Now I am off to see what you have on your desk for investigation and admiration.

Saturday, 21 June 2014

Finnabair inspired Steam Punk

Well I am still on my Steam punk streak.  Finnabair has long been an inspiration to me with all her texture, layers, trinkets and house hold items that she uses on her mixed media projects.  Doing one of her classes with her is on my bucket list...

Due to my addiction to Truth Coffee at the moment, I seem to be rather into the Steampunk style, so I have been playing around with some textures and ideas as seen in the canvas I did where Truth meets Tim Holtz.  but I could not leave it there...

Here are some close up photos to show you some of the layers and techniques I used on this canvas.
I glued tissue paper to the canvas, painted it with brown acrylic paint, added some black for where the bird cage was going and then some bronze Heritage Magic Touch to catch the creases. 
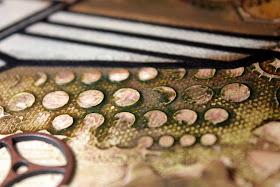
 In this photo you can see the depth of the plastic cogs which were taken from a dead printer and painted with some brown Maya Gold paint and clipped with bronze Heritage Magic Touch. 

The edge of the canvas was done using some cogs and the tissue paper under sticky foil strips and black paint.
 The clock inside the cog is done using the packaging from Tim Holt's metal clocks which I cut and glued behind the cog and the two cogs to the left are covered in distress ink and then clear crackle paint.
 This is some part from the printer I think (as I have a huge bag of bits from printers and computers that have died) which I sprayed with bronze perfect pearl mists and the lock was brass which I painted to match the cogs.
 The electronic bit here is from the inside of the CD rom of my old computer.
Here you can see some of the studs I got from my local habby store to use for added dimension and the raindrops made with glossy accents under the paint.

Thanks for the visit.

Bella

Sunday, 15 June 2014

Father's Day Box card

It would seem that I cannot make a "normal" card any more...all I do are these 3D box cards.  They are so much fun to create and use the same amount of stash, but look far more impressive!

Here is what I made for my dad.
 This is it "flat" above and the top view below...

 View from the right and view from the left

Saturday, 14 June 2014

Truth Coffee meets Tim Holtz

I have had an idea wandering through my head for a while and thought I had to put it on canvas before life happened and it got away from me!

This is a photo heavy post so get yourself a cup of your favourite something to sip on.  No prize for guessing what mine usually is! (I have been known to drive round the mountain to get my fix from Truth - 15 min there and 15 back!)

I am mad about Truth's Coffee.  I told Tim about the place and kept on at him till he went while here in Cape Town teaching at a Convention...He wrote a whole blog post about the place!

So now you see I had to find a way to combine my two favourite things...Tim and Truth!

First I die cut some cogs from various thickness pieces of chipboard and glued them to the canvas.  Then I added some texture paste through a stencil and gessoed the die cuts and left it to dry overnight while I finalised the concept in my head.

I added Distress paint to the canvas, sprayed it with water and let it dry.
I cut the logo from black card stock using my eCraft cutter.  
 Pity the cup is empty...I keep the take away cups and re-use them for water on my desk or to store stuff in.  I like to recycle!
Below is a better view of the paint once it had dried. 
 I stamped some cogs by Deep Red randomly round the canvas and added this well known lady with her binos.  I also used Tim's Steampunk set by Stampers Anonymous for the men, the hand and the diagram which I randomly used on the cogs and between the U and the T of TRUTH.
 Having worked out where the wings of the logo were going, I set about lightening the paint behind them so the word COFFEE would show.
 Then I added some of Tim's idea-ology line and some more stamped images as well as some sticky backed foil which I had run through the 2"x12" Cuttlebug cogs folder and adhered it to the side of the canvas.
 I did Tim's "industrial" technique on the foil so that the shapes have more depth.
 Below you can see the effect created by the texture paste.
This was before I added a shadow to the wings with a Distress marker as Tim taught us at the convention.
Below you can see that I have added more colour round the wings with distress ink and the drop shadow with the distress marker.
 Here is the finished canvas showing off its industrial edge.
 I used crackle accents on the clock inside the 7 Gypsies metal piece and glossy accents on the binos to make them shine.
I know I have already entered a project into the CC3 Challenge No4 over at Linda's place, but I thought I would add this one too as I used texture paste through a stencil...go to page 49 in Tim's book Compendium of Curiosities 3 for the instructions!

The  www.thefunkiejunkie.com  are the prize sponsors again this month...

EDIT: I am excited to say that  Marjie Kemper has featured this project on her Texture on Tuesdays schedule here and want to thank her for this honour.

Thanks also to you if you came from there and took the time to wade through all these photos and got to the end of this post!


Wednesday, 11 June 2014

CC3 Challenge 4: Texture paste.

Every second week Linda has a new challenge on her blog using the latest Tim book called Compendium of Curiosities 3.  This one is page 49 in the book using Texture Paste and layering stencils.  You can find all the instructions in the book together with very clear photos to follow.
Having done a mono print on a Bazzil cardstock off-cut for a video on simple colour wheels, I decided to use it the rest for the challenge in the same colour scheme.
 I am always amazed how bright the colours are as above when wet and soft they are when dry.
I was very tempted to use the back of my artwork cos it looked so funky! 
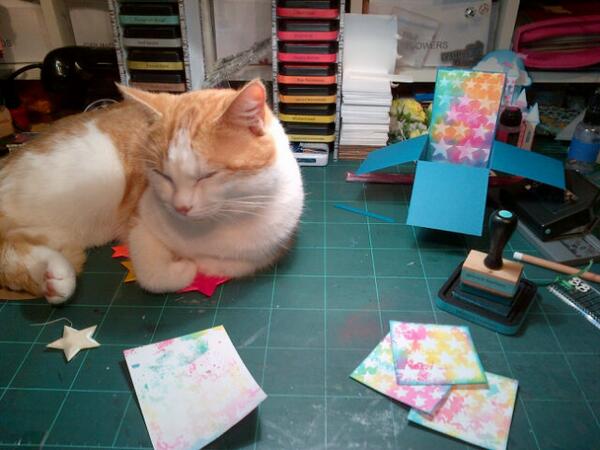
All crafting had to come to a halt as my cat Marmalade discovered the desk lamp was like a personal sun and he curled up under it to keep the winter chills away!
Once he was warm enough and had moved off, I could continue...Here it is with all its pieces ready to be made into the pop up you see below

I love how the texture paste has dimension behind the puffy stars.

Then here is another angled shot.  Man!  These cards are so hard to capture on camera and give the whole effect.
All the even-numbered challenges are sponsored by The Funkie Junkie Boutique, a fantastic online shop that caters to fans of Tim Holtz and his gorgeously grungy style. The Funkie Junkie will award a $25 gift certificate to one lucky, randomly selected participant. All you need to do to be eligible is link your project here, and include a link the www.thefunkiejunkie.com in your blog post.

Tim and Mario are also sponsoring an awesome prize if you comment on all the design teams blogs!  How cool is that?

What's on My Workdesk Wednesday 262? ATCs


Taken of Lunch Lady Jan's page:
Edited 12.42 GMT.  There will not be a WOYWW link today, I've just heard from Julia, she has been taken ill whilst on holiday and is in hospital. Not life threatening but she is not well. PLEASE do not email her, if you want to send a message, then do it through me. She won't be home until next week, so I don't know if there's going to be a WOYWW next week either.  Sorry, I don't have any more info at the moment but will let you know with updates as soon as I get them. Jan xx


Hello Fellow Desker from Julia's place over at Stamping Ground.  Welcome to my desk in Cape Town, South Africa where it is 3 Degrees Celsius outside at the moment at 7:30am.  We kid ourselves that it does not really get cold or hot here and therefore our houses are not designed to cope with either!  I am walking around with a hot waterbottle to keep warm!

Before I talk about the mess on my desk, here are the wonderful goodies I got via my good friend Ali H who took my ATCs to swap at the crop for me and posted this parcel of artistic goodness back to me!
I have received ATCs from: Sam (Hettiecraft), Lynda Beazley, Maggie C (Silvercrafter), Debbie (Tatteredrocks) (acrafterslife), Shazsilverwolf, Elizabeth (Bluebeard and Elizabeth), Ali H (Craft Cauldron), Pearshapedchris, Minxy (the altered inker), Julia Dunnit herself! Zoe

The tag is by Debbie of Tatteredrocks and the yummy smelling lavender bag is from Lunch Lady Jan.  The card and two stamping Mags are from Ali H who put this all in the post for me.  So very grateful to all of you for my stash.

My desk is the fall out zone of the star card project I have been working on to enter this weeks Compendium of Curiosities 3 challenge over at Linda's place.  I will be doing a proper post about that now that I have finished it.  It took a little longer than anticipated due to Marmalade discovering his own personal warm sun under my desk light!
Embedded image permalink

That's all from me,  I am off to see if our leader has Mr Linky back or if he is still on Holiday with her!
thanks for the visit and comments.

Bella

Wednesday, 4 June 2014

What's on my Workdesk Wednesday 261? Video leftovers

One of the girls on the Creative Chemistry private Facebook group was having trouble with all sorts of "ugly" as she put it, while trying to make Tim's latest June tag.  I made a short video to explain colour theory...If you don't want to go to the vid, here is a short explanation:

quick colour theory lesson to avoid muddy colours. draw a triangle! put red, yellow, blue on each point. then between yellow and red on the straight side, write orange, between blue and yellow write green and purple on the last side. now you can easily see one side of the colour spectrum. stick to the three colours on that one side and you will be fine. the minute you go round the corners you will have mud cos the three primaries make brown. the opposites will also give mud! inside the triangle, draw an arrow from the point of each corner of the triangle down to the middle of the opposing side...that is its opposite colour or complimentary...ie:red/green yellow/purple and blue/orange...these too will make mud when blended.
I also made it to the shop during the week-end to get the thinner foam core board to finish my two ink towers.  Yes Elizabeth, they slide in and out easily and because the shelf ends a little before the pad in the front, you can get at it and grip it to pull it out.  I will do a tut on it one of these days.

See you at your desk...with or without Mr Linky...he is on holiday with our leader!

Bella


Monday, 2 June 2014

June tag of Tim's 12 Tags of 2014

I just love the colours of this months tag and all the techniques used.  It really spoke to me!  So much so that I had to make it quickly before going to work!
This is what my desk looked like after a frenetic creative moment!  Although for once, I have all the products Tim used to make his tag, I wanted to change it up a bit by using the dragonfly stamp and because I liked how my stencil print came out, I decided not to cut it down, but use the whole thing!

Below is a close up showing the distress glitter on the wings and the piece of "shattered stains" grunge board wings underneath.  It was an offcut left over from the class I did with Tim in JHB.  Glad I kept it... It goes with the sentiment I used and repeats the pattern on the stamped wing!