Showing posts with label Stamperia. Show all posts

Monday, 5 September 2022

Octoship Canvas for Mitform Castings

I really enjoyed creating this "Octoship" by mixing and matching parts of Stamperia moulds and then adding the perfect Mitform Castings metal pieces to finish it off.
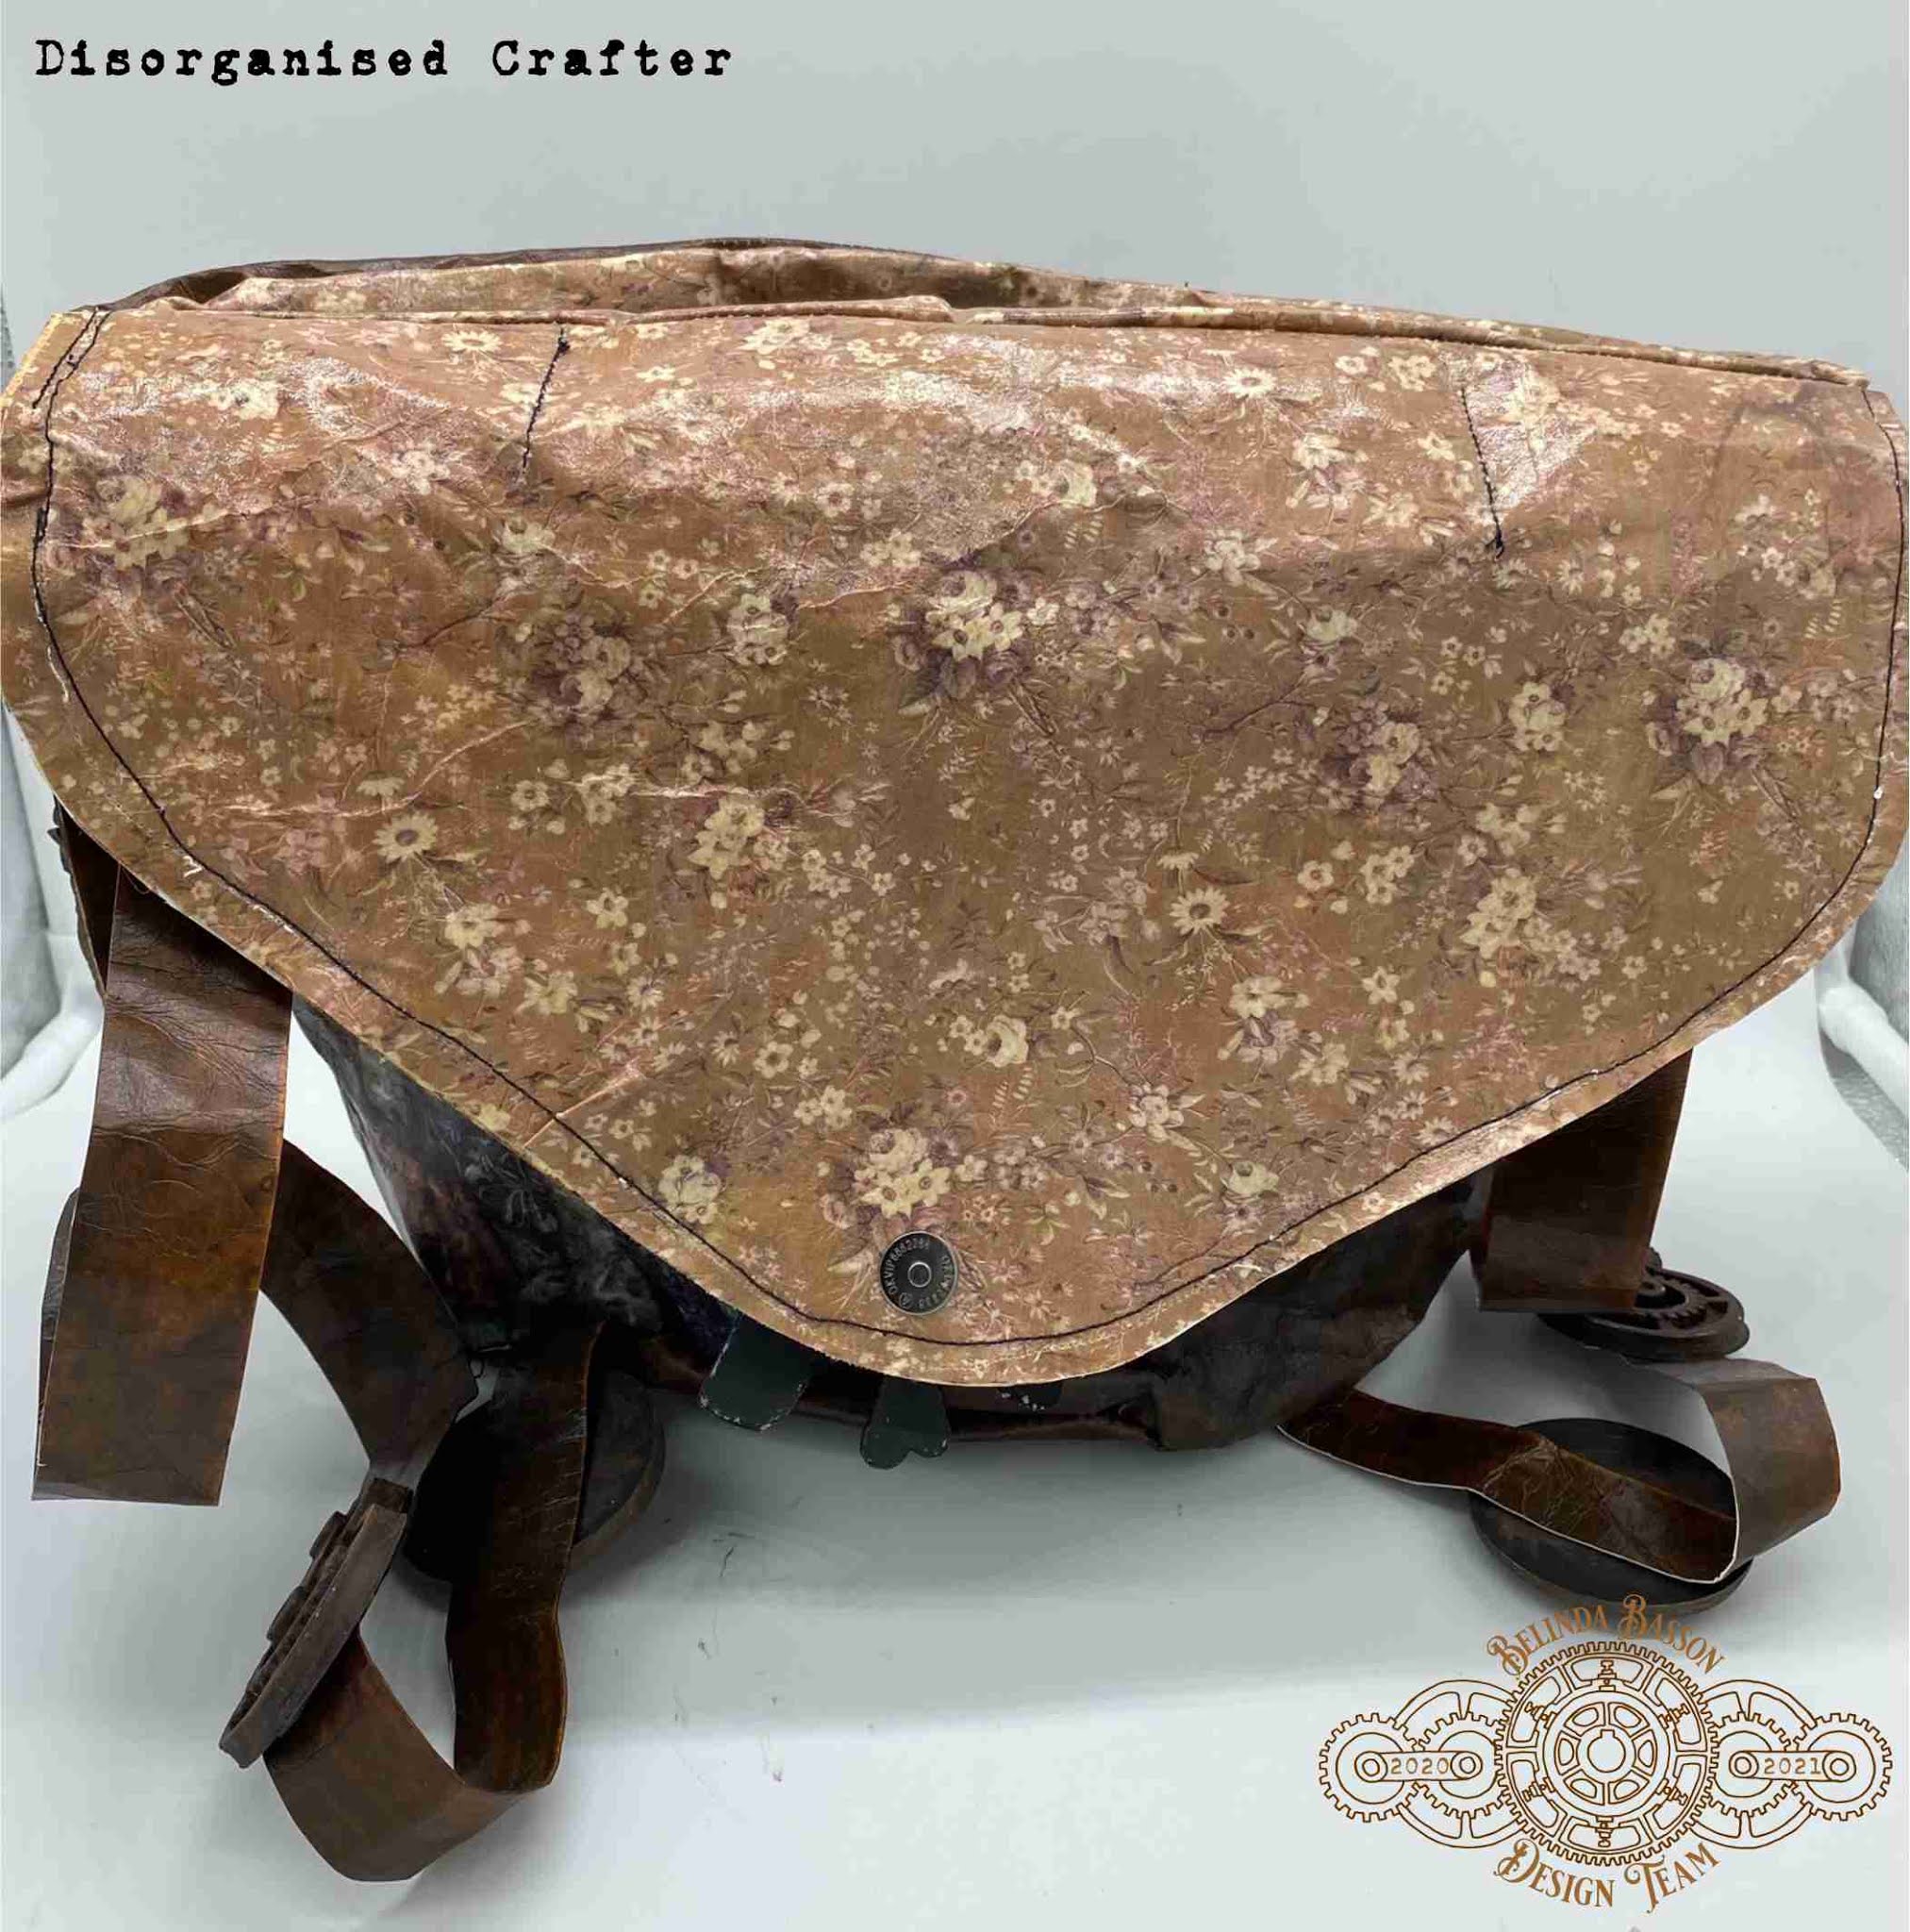
I started with a base stenciled in Modelling paste and then covered that with the water based antiquing pastes by Pentart.
I used a babywipe to blend and remove the excess
Then I plotted my pieces.
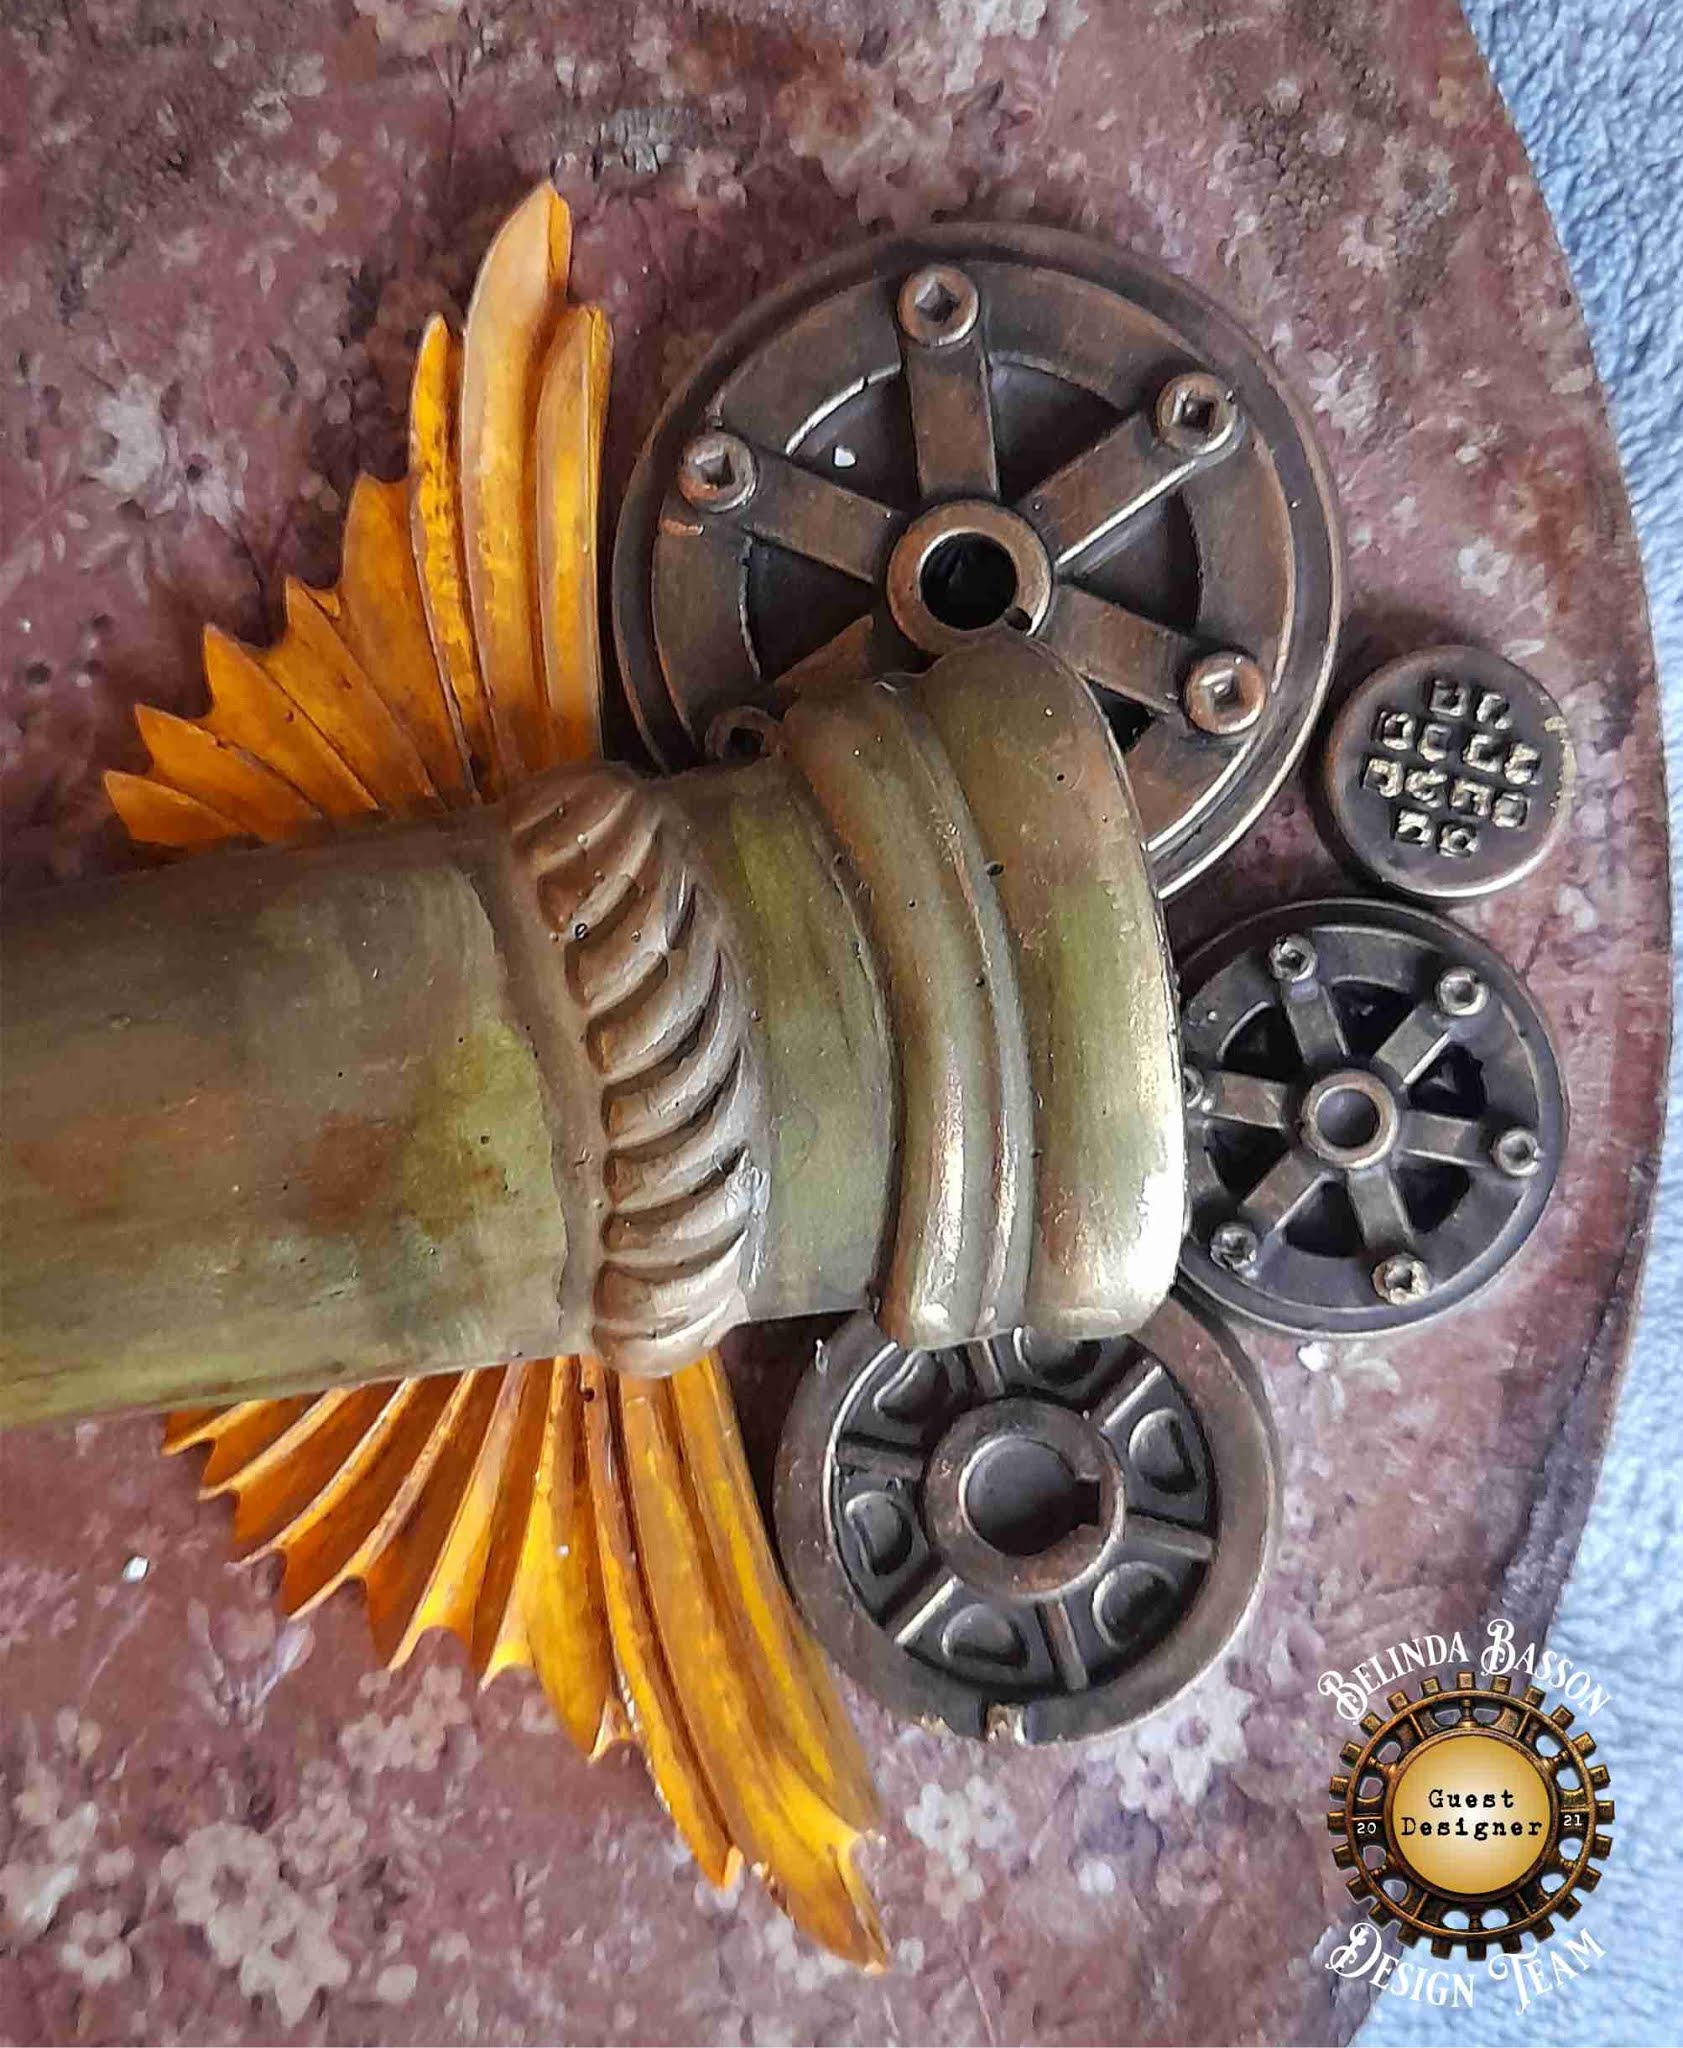
I spay pained all my moulded pieces black and got out the gold Cerantica wax.
I waxed the stencil work on the canvas with copper on the left and gold on the right.
Using the turquoise antiquing gel I painted the Mitform pieces.
And put the whole canvas together.
Below are close ups of the various pieces


Here are the links to the items I have used.
https://www.mitform.com/produkt/zawor-valve_1_ste/
https://www.mitform.com/produkt/bulaj-okretowy/
https://www.mitform.com/produkt/helm_nurka-ste/
https://www.mitform.com/produkt/mitform_set_clock_2/
https://www.mitform.com/produkt/mitform_set_scale_1/

Tuesday, 26 January 2021

Design Team member Disorganised Crafter for Lady Vagabond


Dear Reader

Today it is Nikki's turn (AKA Disorganised Crater) to show off her skills with the Lady Vagabond line...

She has used stone paper by Stamperia to create this amazing backpack bag.

If I didn't know it was paper, I would have thought it was leather!  Quite mind blowing!

I love how she incorporated the moulds on the flap and the straps as well as the handle and even the Supervisor has a spot on the tag!


The inside of the bag has been lined with the A3 ricepaper!  


I love the gears she has added on the shoulder straps as details


Wednesday, 30 December 2020

Guest designer Inge van den Broek for Lady Vagabond

Dear reader

Please welcome Inge for todays post using Lady Vagabond and products by Stamperia:

I used the following products of stamperia

-          Ricepaper: Lady Vagabond White Flower DFSA3083

-          Moulds: Lady Vagabond Fly Machine K3PTA482

              -        Lady Vagabond K3PTA487

              -          Lady Vagabond Belts and Fasteners K3PTA484

-          Old Looking wax Metallic gold K3P15G

-          Mixed Media Glue DC28M

-          Vintage Antiquing Paste Brown KAOLBR

-          Crackle Paste Transparent K3P50

-          Mystik Ink different colours  KAMYST (different Numbers)


I  started with a round MDF plate, put Mix Media Glue on it and covered it with the ricepaper. After that an extra layer of Mixed Media Glue to protect the ricepaper.

Then I used several soft moulds A4  the Lady Vagabond, Lay Vagabond Fly Machine and Lady Vagabond Belts and Fasteners. I painted them with different colours of Mystik Ink and Alcohol Ink. A technique I saw Belinda doing and since then I love this technic and use it a lot. Thanks fort hat inspiration!

I then covered it with Old looking wax metallic gold and the Vintage antiquing paste to give it that extra vintage look.


On the ricepaper I put some crackle paste to give it an old worn look and a bit of gold wax and antiquing paste to highlight it

Of course the supervisor belongs in here too. So I put him high on top of the suitcases he sees everything.


Tuesday, 8 December 2020

Lady Vagabond Design Team Post


 Dear reader

Today is the start of the Design Team posts for the Lady Vagabond line!  As the creator of this line, I decided to go first!  There will be inspiration posts every Tuesday and Thursday from now on!

I recently had to create a number of projects for the Hochanda TV show in the UK and recorded all 5 of the projects and took photos before I packaged them up and posted them off.

Here you can see the hands of Leonie holding the hat above and Fiona wearing the hat below!

For my first DT post, I have chosen the Steampunk hat using the Stamperia mould and book paper.

The rusty look on the top of the hat is created using the Allegro paints.

I put the Burnt Umber pigment powder into the resin when I moulded the wings and some of the gears and then picked up the details with gold Vivace paint.  This meant that the wings have their own colour and I did not need to paint them.

The lightbulb mould is from Antonis Owl mould and I filled it with Crystal Clear resin and painted the raised areas with gold Vivace paint.

Monday, 2 November 2020

Exciting times ahead!

Dear reader

I know I have been sporadic at most during the past year and a half in posting here, but for good reason... Having moved countries and set up home in early 2019, I then set about finding my way around the craft world of Europe!

I was invited to become an International Teacher for Stamperia and then to be one of their new product designers!  All in the space of the last 6 months!

It has been a crazy ride and finally I have been able to share all my new designs with everyone.  My new line is called Lady Vagabond which goes together with Antonis Tzanidakis range called Sir Vagabond...

The products will start shipping from mid November and should be in the shops world wide by the end of the month!

I cannot begin to tell you how excited I am to see what people create with my line of papers, moulds and stamps etc...

These are my suitcases which I use for craft storage in my lounge... 
I stacked them and drew them and turned my drawings into stencils and images for the papers as seen in the double page spread below!

It is truly a surreal feeling to be finally holding my products in my hands!

I look forward to sharing projects with step out photos here in the weeks and months to come.

Monday, 27 July 2020

Steampunk Magical Time machine

Hello my dear blogger friends!

Sorry that I have been so quiet!  Since I started at Stamperia as an international teacher 3 months ago, it has been the craziest time of my life!

I have created 3 online classes for their e-Academy, one of which is a free class, the other two are 25 Euros each for 2.5 to 3 hours of video time and PDF notes... 

Then we had the teachers training for a whole week...

and now we are near the end of the on line Contest over on Stamperia's Facebook page.

I am up today in group 7!

I would really appreciate your vote here:  Stamperia Facebook page

Here is my project!  The public have until 12 mid on Wednesday to vote for their favorite in this group. 
Then there will be the last group No8 and the 8 finalists will go against each other in 2 groups of 4... Then the winner from each of those groups will go head to head in the battle for top spot!

It started off as a "blank Canvas" in the form of this little old clock which had seen better days.  
I painted it with Alegro paints by Stamperia as they have a matt finish.
I then added some moulds from the texture impression sheets by Stamperia as well as some laser cut grey board for a steampunk feel.

The new snowflake mould was perfect for inside the clock and I created some clear snowflakes using the new Crystal resin with brilliantini glitter inside for extra sparkle.
I created a backing to hide the workings of the clock using rice paper adhered onto some acetate.  This defuses the light from the inside of the clock which I put inside the snowflake

Finally, I made a little book to go under the clock where you can keep photos or notes or keepsakes.

The last thing to do as add some extra shine to the project with pink Cerantica wax through a snowflake stencil on the base of the clock and to pick up the highlights on the various moulded items on the rest of the clock.
I used rice-paper wings on acetate again to create the wooden laser cut fairy's wings which have a lovely translucent effect.


Thanks for stopping by.