Hello there
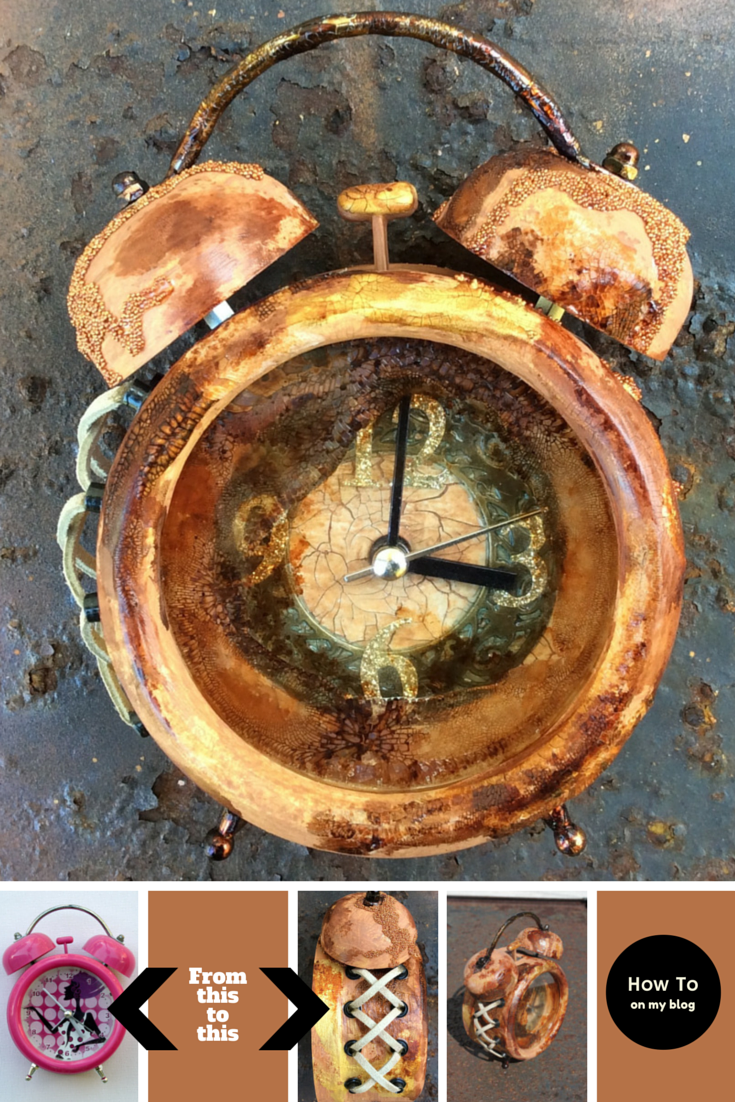
Welcome to my photo tutorial of how I turned this cheap kids find...
into this! and yes...it still works!
My inspiration was this clock which I found on Pinterest. It is created by Heather Jacob and if you click on her name you will go to her blog where you can see the original.
First I took the whole thing apart. All I needed was a screwdriver and this is what I got:
I covered it in a decent coat of Heavy Gesso for "tooth"
Then I added some Vintage photo Distress paint over some gold crackle texture paste by Finnabair.
I got carried away by the moment of playing with the paint, so there are no step out shots of how I got here, sorry!
I used Finn's platinum crackle texture paste on the clock face and when it was dry, I rubbed Vintage photo Distress paint over it to get into the cracks.
Then I added thick bits of Finn's gold texture crackle paste as well as some Glossy accents and some micro beads to the clock body for shine and texture.
On top of all of this I added a thick layer of Finn's clear texture crackle paste in random places and let it dry.
When it was dry I dripped brown alcohol inks onto it so that it would flow into the cracks.
This is the glass face with the clear crackle texture paste on it filled with ginger alcohol ink.
Having done all of that, I decided it needed some Steampunking and glitter so I could enter it into Finnabair's "Sparkle and Shine" challenge!!!
I found some yummy glitter numbers in my sticker stash and glued them on top of the metal embellishment which I filled with Glossy accents.
I glued some 4.5mm eyelets upside down onto the side of the clock and when they had dried I added pieces of leather thong and glued them in place too. Nothing like some "high tech" painter's tape to hold it in place while it dried!
Then it was time to put the whole thing back together!
Woops...I saw in this photo that the inside of the "bell" was still pink, so I took them off and added black distress paint! Phew!
I am also entering this into Sandee and Amelie's Steampunk Challenge where you have to do something with a 3...in this case the time on this clock is 3 o'clock (or rather it was when I started setting up the shot...)as Mario, Tim Holtz's logistics director always has coffee at 3!
Hope you enjoyed that!


Super cool& funky!! Just love this project <3
ReplyDeleteAmazing! LOVE the beading and laces!!! Jenny x
ReplyDeleteWhat a great find and what a fabulous transformation, I love the look of the micro beads and the lattice you added is a brilliant touch. Anne xx
ReplyDeleteWay cool! I'll have to keep my eyes open for deal so I can try this. Hugs
ReplyDeleteAwesome alteration! The texture is perfection!
ReplyDeleteWow, from little girl pink to a beautiful steampunk clock. I love the glass beads and I really like the leather lacing too! I saw your purchase and was waiting to see what happened - a wow transformation. Thanks for sharing.
ReplyDeleteLooks awesome. Love the colours and the texture. Way to go on getting it all back together again in working order. Love it.
ReplyDeleteGorgeous, your 3 o'clock is perfect, texture and colors....
ReplyDeleteThank you for your participation at Sandee & Amelie steampunk challenges
Coutureuse
Oh what a gorgeously grungy result, fabulous textures!! Stunning! Ruth x
ReplyDeleteFanflippitatic Bella!
ReplyDeleteHubby's clock broke down recently and I would not allow him to throw it away. Like you I think the alterable ones are too pricey.
You have done a great job.
Hugs
Hettie
Xx
Awesome! I am sooo glad that your clock shows 3 o'clock so you can share your brilliant make with us at SASPC! ;)
ReplyDeleteAnd I am happy that you (obviously) got carried away with painting... because this is what helped turning that pink monster into an awesomely rusted treasure! LOVE love love it!
Thank you so much for sharing this stunning make with us at SASPC!
Claudia x
Wow, that's simply impossible - is this the same clock? Is it really?! I soo need one like that! :) Amazing work!
ReplyDeleteThank you for sharing it with us at SASPC!
Agnieszka
Oh wow ! This is spectacular work ! Love the tutorial too. You have put so much work into your project, you have achieved an amazing mixed media results. The textures, the colours ! Wow amazing. Love the transformation. Thank you so much for sharing your art work with us. Thank you for taking part in Finnabair 'Sparkle & Shine' challenge. Best of luck. Hugs, Marta xx
ReplyDeleteIt's so creative! I love vintage look!
ReplyDeleteWow- so many cool elements and textures. this looks fabulous.
ReplyDeleteGreat clock! Love that you've done a tutorial about it! Thank you for joining the Finnabair "Sparkle and Shine" challenge!
ReplyDeleteHi Bella, how lovely to see all the steps you took in this amazing altered clock. I love the micro beads looks like bubbles of rust. Thanks for taking the time to leave me a comment at A Vintage Journey for me.
ReplyDeleteJulie x
Thanks for the hint on the wrong picture on our challenge blog! I have no replaced it with the correct one. Congrats once again on your Top3 with our January challenge!
ReplyDeleteClaudia x
Congrats for your top 3, your clock is fantastic!
ReplyDeletenice make over
ReplyDelete