Friday, 24 October 2014

New look for my Blog

Hi there

You might be forgiven for thinking that my blog has had a multiple personality of late...

I have been doing lots of research and trying new things out to see if I can do the background stuff and get the look I want for my blog myself.  It has been a learning curve of NOTE, in fact, I would go so far as to say that there was no curve at all, rather a perpendicular line going straight up!

But I persevered and I think I have it looking how I want it for now! (there might be a few more tweaks coming) I still want to try and create a blog header that I like, this is currently the text which Blogger has available.
What do you think?

Hope you like it!  Please let me know if I need to change font colours or anything else as my 21" screen and yours will be very different which I discovered when I viewed my blog on my DHs 17"screen across the room!

Even worse, I have just looked at it on my dinosaur of a computer at work (screen shot as seen below) and you can't see any of the side image...oh well, cant't win them all!  Makes me wonder what you see?

Thursday, 23 October 2014

Playing with Canva

Hi there

As part of my mission to get more "on line friendly"  I am investigating all sorts of things.  One of which has been blog Graphics.  I have come across a site called Canva and they are awesome for making your own graphics.  It is so user friendly.

This is the photo collage I put together using their site.  It was made in the Pinterest section so it will be the right dimensions to show up well in Pinterest!  This is my test run!
If you want to see how I made this project please go to the post here!

Wednesday, 22 October 2014

What's On My Workdesk Wednesday 281? Free On Line course!

Embedded image permalink
Hello Fellow Deskers from Julia's place and visitors from Blacksburg Belle!

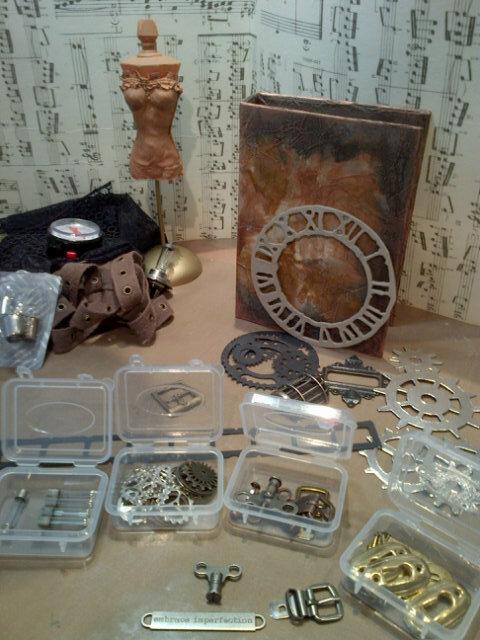
Above you see me "shopping my stash" for the worn cover I was busy with on the week-end...not much has happened on my desk since then!

Here is the finished worn cover.
Since finishing my cover and putting it "out there", I have had many peeps asking me to teach it which got me onto the subject of doing on line classes...the only question I have is how?
This got me thinking about all the work I put into the creative classes I teach and have been wondering how to make them into online classes...The answer I think is in the course I am about to attend by April Bowles-Olin on CreativeLive on 10 & 11 November.
April asks us to pick one of 5 questions to answer as to why we want to do this course and I am going to answer 2 because I think they are pertinent to me.
Q) Why you want to learn how to create and sell digital products
A)  Who doesn't want to earn money while you sleep?  That is just so appealing!  I have taught real in person classes to students for 17 years and the amount of work in both prep and time is the same if you do it for a video camera or for an in person class(if you exclude the kits!).  The only difference is that the in person class is taught once (has kits which take hours to prep) and can only earn me so much...where as an online class can be repeated at the press of a button and can be earning me money every time someone purchases it and there are so many more viewers on line!
Q) The biggest questions you have when it comes to selling digital or information products?
A) Apart from the classes, I want to create digital cut files to sell.  How do I know if they will work on all the different machines out there if I only have one of them in my studio to test it on?
I also want to create videos.  We do not have great bandwidth here in South Africa and I am worried about the quality and what camera and programs to use to edit it. 
So my fellow Deskers, I know this post has been long and wordy...I am in no way affiliated with April or CreativeLive, but thought I would share this with you as we are all creative in some way with some or other medium and this is free!

This is the blurb off her blog: “Are you ready to make your creative work more lucrative, stable, and sustainable in the long-term? Join April Bowles-Olin for an introduction to digital products and how they can enhance your creative business. This course will show you how to produce and position viable products for generating multiple revenue streams and passive income. RSVP right here to watch it live and get access to the workbook for FREE. This post is part of the Create Digital Products blog tour.”

Tuesday, 21 October 2014

Signature Issues...Fixed!

I created a signature for myself for the end of each post I write. It automatically adds itself when I hit publish! I did it in about June this year.  Recently I was fiddling (as one does occasionally) with the background/wallpaper for my blog...

Then I noticed that my signature had vanished!

I did nothing there or so I thought!

So...how had I created this signature back in June?  I could not remember!  Thank goodness for GOOGLE!  Yes I Googled "how to create a signature at the end of my blog" and up popped a few suggested sites.  I went to two that required me to use the HTML...all gobledygook to me, so I pushed on and found Code it Pretty  This blog explains how to do it in a way that even I could understand and so my signature was back, only so was the irritating photo background that I had got rid of originally when I lost my signature...they seem to be quietly and inextricably linked by Blogger in the back of beyond in the HTML mess that I do not understand, so I have re-deleted the photo and hopefully I am back in business!

If you need help with your blog, I do suggest you go to this Code it Pretty site.  Not because I get anything from sending you there, but because it helped me and so I would like to pass on the favour and help you if you ever need some blog tweaking advise or help!

Ultimately I am an artist not a techno geek...I just want to create, not waste time setting things up on Blogger!

Sunday, 19 October 2014

Compendium of Curiosities 3 Challenge 13!

This is a photo heavy post, so get comfy if you have the time.  Although I cannot tell you all the details on how I made this worn journal cover, I can show and tell the extra bits which I did to add to my project that are not in Tim's book on Page 35!  Go to Linda's blog to see more ideas by the Curiosity Crew for inspiration.

I started with a brand new Cover.
 Covered it with Gel medium
 Then adhered a sheet of gift wrap tissue paper which I had scrunched up.
 When the front was dry, I glued the inside and wrapped the paper round the cover.
 Now I had a textured cover, inside and out!
I started on the front cover with distress paint and water which takes an age to dry, but I prefer it to air dry than help it with a heat gun as it seems to dry more interesting when left to its own devices!
 You can see how much paler it dries below! 
 Once this was dry, I had run out of patience so I did the inside with a thin layer of paint and blended it with a baby wipe.  This showed up the wrinkles nicely.
 Once this was dry (which was quick!) I lightly smeared some bronze paint dabber onto the raised areas of tissue paper around the edge of the cover, inside and out.

 Then I set about making the decorations for the cover and shopped my stash for trinkets.
I added distress embossing powder to the clock die to make it look rusted.  
Here you can see how I plotted my layout before adding my stencils.
 I discovered a great thing about this stencil, if you stencil it straight first, you can angle it the second time and get a full second clock at the top!
as per below!
 This is the finished base for the front of my cover.
 The inside looked like this before I added the cut off piece of clock die.
 I used a brad though my ribbon, the buckle and the clock die to anchor it all in place.
This is how it looks from the top
 The clock face from the remnant rub fitted perfectly inside this Spellbinders cog die.
 For extra texture I added some flat backed pearls.
 The safety pin on the spine acts as an anchor for the excess ribbon once it is buckled up.
 The Antique bronze distress paint that I added to the metal cogs and word strip look  almost gold in these photos, but they are quite copper in real life!


 I added the off cut from the front clock to the inside cover of the back page.

 This is the buckle closed, as if the cover was full inside.  I am still working on the contents!
 Tim's buckle is such a clever piece of idea-ology.  Functional and good looking!
So this is my cover, inside and out.

If you want to join in this challenge, get yourself a copy of the Compendium of Curiosities 3 and go to page 35.  This is an odd numbered challenge, so the sponsor for the lucky draw prize is Inspiration Emporium who are giving a generous $50 voucher!  Tim and Mario sponsor an awesome selection of goodies as the prize for the person's project chosen by the Curiosity Crew.  To be eligible for this prize, you have to comment on every Curiosity Crews members inspirational piece and stick to the few rules Linda stipulates....

Saturday, 18 October 2014

Finished Art Journal Pages

Wow, for the first time in 2 years my class ran over by 1 whole hour and a bit!  I normally finish BANG on time with a few minutes of shopping time to spare!   It got a little stressful at the end, with everyone trying to finish their pages, but hey, they did a marvelous job.  I talked too much at the beginning of class, but then I had never taught art journals before and tried to teach more than 3 hours could hold!  Talk about a learning curve!  I had planned an hour a double page and half for the front page allowing me half an hour to talk...Going to have to re-work that!

Here is the opening page with David's face printed onto dictionary paper and gelled onto the page with Distress paints over the top followed by archival ink stamping and then I used a Poska white marker to play round the edges and do my signature.
This page theme was taken from Vicky Papaioannou's Blog  but the base technique was completely different and I pre-cut the cups on my digital paper cutter, added a cupcake to the stack and the title!
Again this theme came from Vicky Papaioannou's Blog but I did an entirely different base page technique using gesso through one stencil and Gel medium through another which got glued to the page with gel medium and then worked over with Distress inks and distress paints.  The feather was a bought stamp and the dream catcher worked from the Martha Stewart circle punch design.

Thursday, 16 October 2014

Take a Walk on the Wild Side Double Page Layout

AT LAST!  and yes I am shouting!  I have finished this page!  I have been working on it on and off for 2 months or more.  This is the class I am teaching in the first week of November.  I know that sounds a mile away, but I have to let my students know what to bring and what photos they will need.   I still have to kit it up and it will be my son's 10th birthday party the night before I teach this class, so no time for last minute dot com!
I have used alphabets that had multicoloured letters and painted them using Distress paint.  This is the easiest way to neutralize colours.

Then I have made an extra flap up section that can go over the sleeve of the album for those notes or journalling to be read later.

This is the front of it
 Then one page down and below, the base page
 I have used washi tape on the buttons to make them match the rest of the page.  This stuff is just the best!  It is so versatile.  This pattern lines up so you can make repeat pattern sheets from it too!

Wednesday, 15 October 2014

What's on My Workdesk Wednesday 280? Double page layout

Hello fellow desker from Julia's place over at Stamping Ground.  Welcome to my desk in Cape Town, South Africa.
Here is my desk in all its designing glory...this page has been 2 months in the making and it needs to be ready for the first week-end in November!  Why is it that some pages come together like a dream and others feel like they are never going to amount to much?  I keep taking it out and playing with it and perhaps finding another gem of an idea I can add and then putting it away cos it just does not have the "wow factor" yet!  Now it is staying on my desk until it is finished!

I am teaching Art Journals this week-end and that class thank goodness is planned, prepped and kitted!  PHEW!
These are the base of each page and the cups will be going on the one above it, an idea I got from Vicky Papaioannou's Blog where she gives an awesome video on how she created her page.  I have created a cut file for these cups as I need to kit for 10 people who I know wont be able to draw and make their own cups like she did.  So I have used her concept, but my page will look very different.  In order to teach the techniques, I have prepped my journal and finished the right hand page so I can demo the left hand page in class.
Embedded image permalink
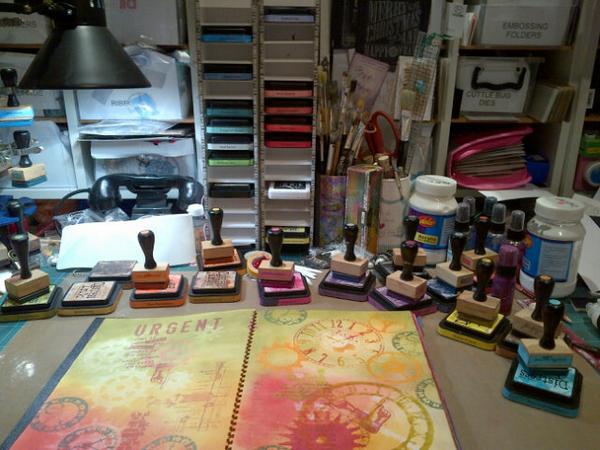
At some late stage on Sunday...this is what my desk looked like while I finished sample pages in my journal to show class...nearly every ink on my desk!

Monday, 13 October 2014

You are My Sunshine in the rain Double Scrapbook Page

Seeing as my blog name is Bella's Scrappin' Space, it is about time I posted a scrapbook page!  Here is a page I taught recently using Tim Holtz stencils and inks as well as Ryn's beautiful water droplets stamp.  I fell in love with this stamp every time I saw some one use it on line and finally ordered one for myself from her shop here.
First I used Spiced Marmalade through the rays stencil and then I shifted it off and used the Peacock Feathers inbetween...it takes some fiddling, but it kind of fits itself in reverse and so you can add a second colour without making a mess all over your first colour.  I then added Spiced Marmalade where the sun ball would be.

After doing the sun, I inked peacock feathers all along the bottom of the page and using the same ink, I stamped the droplets in a repeat pattern.
 I used my eCraft (like a Silhouette) cutter to cut the You are my Sunshine in the Rain and diecut Tim's Umbrella man all from black card stock.
In order to be able to mat all 4 photos from one 12" x 12" sheet,  this is how I lay them out.