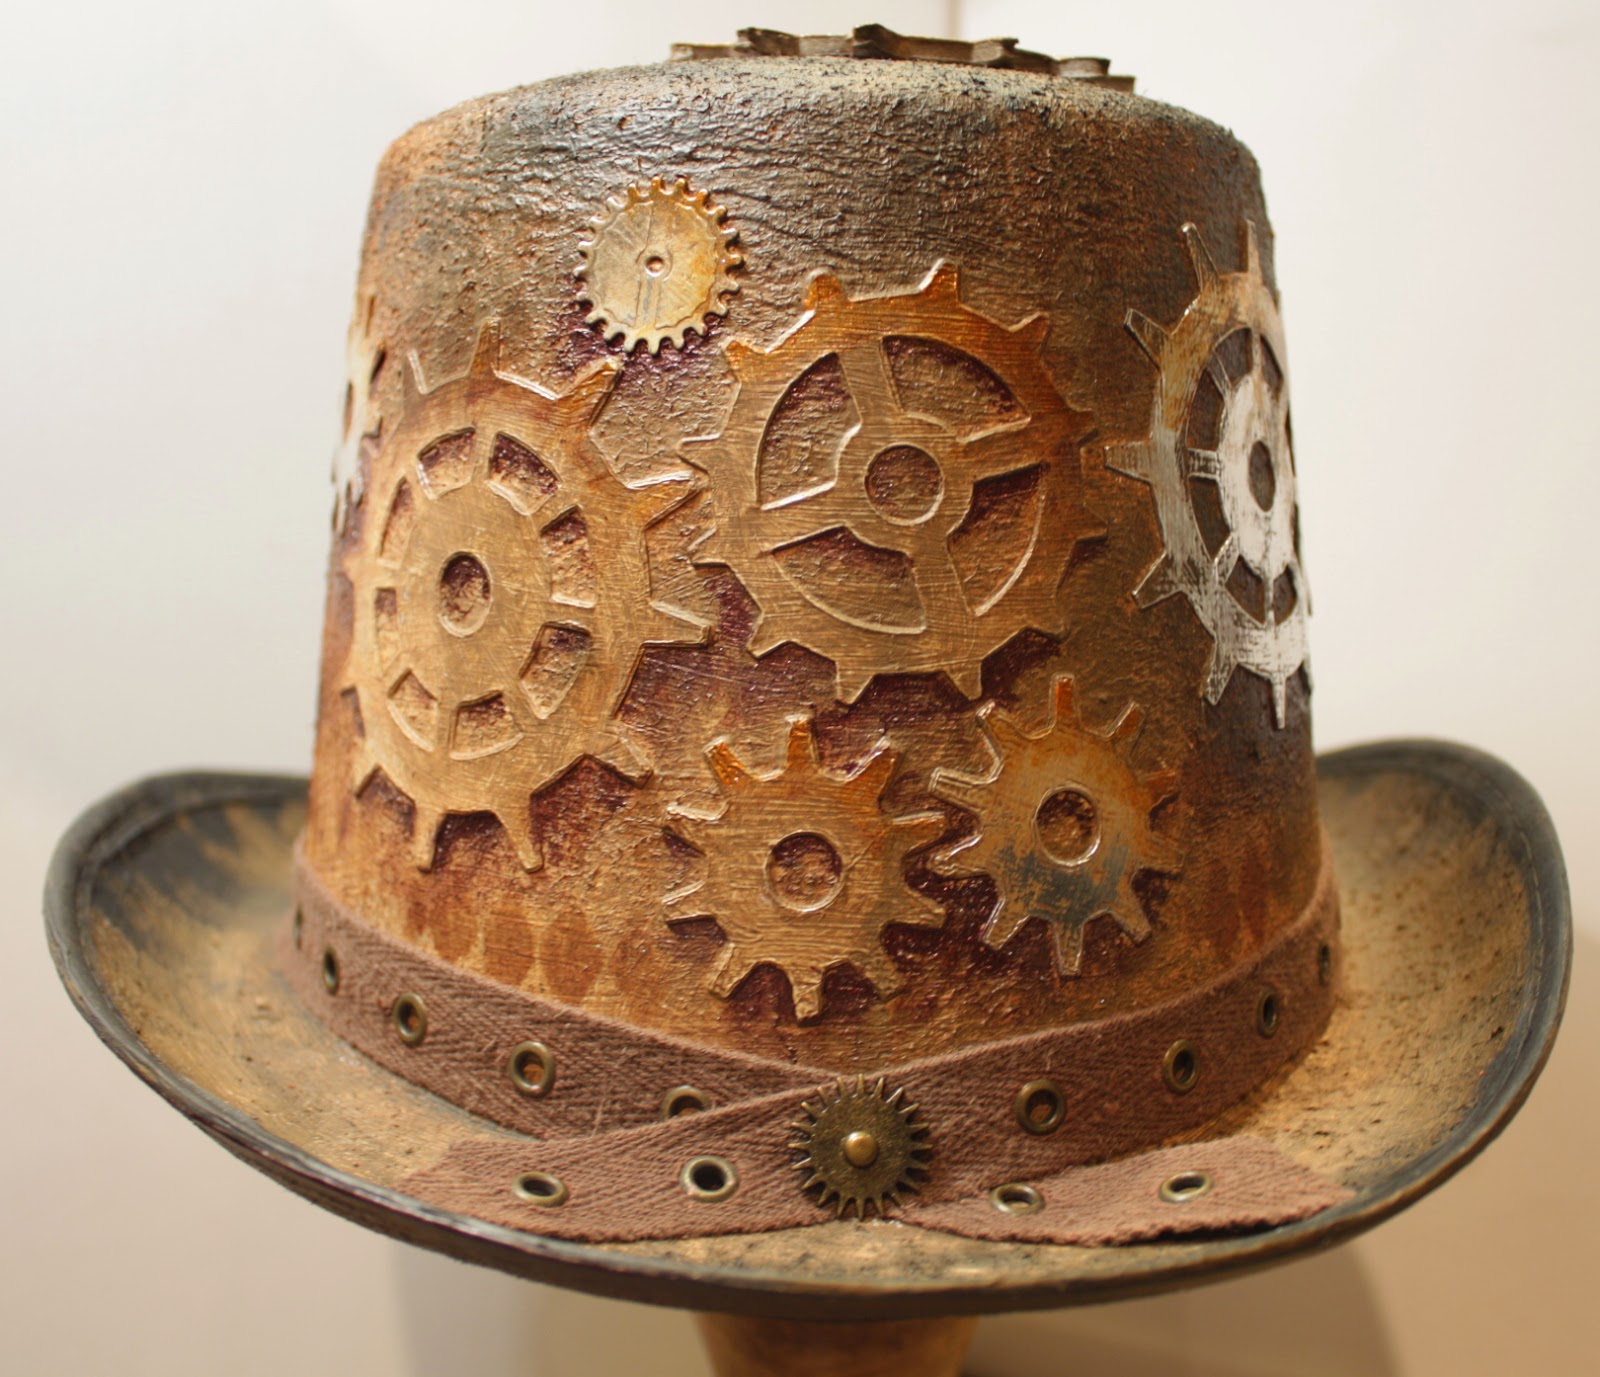
Get a good cup/glass of something, cos this is a photo heavy post of how I made this top hat!
I started by painting the felt hat with gesso, when this was dry, I put a layer of gesso through this Stencil which I held in place with painters tape.
Then I added some distress paint and waited for it to dry. I could not heatgun this as the foamcore melts...this tested my patience a tad...
Once the base paint was dry, I set about adding various shades of brown and some metallic paints in the dark brown and copper. The final touch was adding the shadows in black beneath each item on the hat.
I used the same stencil and added some Coffee Archival ink through it so there was some continuity around the hat.
Now to decide how I am going to do the final hat in the series...maybe a bit of a girly version?
I started by painting the felt hat with gesso, when this was dry, I put a layer of gesso through this Stencil which I held in place with painters tape.
Why is it that I always land up working in a tiny space? I did clean up the chaos after I took this photo! I needed elbow room! Once I had let the gesso dry, I added some cogs cut from foamcore and some from cardstock, covered with sticky backed foil.
Below are the photos of the hat in its gesso stage.
Then I added some distress paint and waited for it to dry. I could not heatgun this as the foamcore melts...this tested my patience a tad...
Once the base paint was dry, I set about adding various shades of brown and some metallic paints in the dark brown and copper. The final touch was adding the shadows in black beneath each item on the hat.
I added some of Tim's idea-ology line to the front.
I used the same stencil and added some Coffee Archival ink through it so there was some continuity around the hat.
Now to decide how I am going to do the final hat in the series...maybe a bit of a girly version?


that's just awesome!!
ReplyDeleteWowzer Bella. This is fabulous. you have done such a great job on this and the one below.
ReplyDeleteHats off to you girl!
Hugs
xx
Love your hat!!!!!!!!!!!!!!! hugs, Patty
ReplyDeleteWowzers! They will love your hats, Bella!
ReplyDeleteI definitely love this one! And thank you for sharing not only the very interesting story (can't wait to see how it continues!I am sure it will be a success) but also the load of awesome stepxstep images! I really enjoy learning about the stories behind projects = learning about how they come to life.
You put such a lot of love and labour into this hat! It's wonderful!
Thank you so much for sharing it with us at SanDee&amelie's steampunk challenges!
Hugs,
Claudia x
Great steam punk composition. I like it very much. Well done.
ReplyDeleteDear Greetings
Sabine
Way way way cool!!! I love it!
ReplyDeleteYour hats are gorgeous. Love the colours of this one. They look so vintagey :D
ReplyDeletewonderful Work Bella , Shaz in Oz.x
ReplyDeleteVery impressive!! Fabulous!
ReplyDeleteHugs, Neet xx
Love love love it Bella!!
ReplyDeletewow what hat and some amount of work a real labour of love but an extraordinary result thanks for sharing it with us ..great photos
ReplyDeletehugs
andrea
Your hat is gorgeous !!! I love the colors... and embellishments....
ReplyDeletethank you for your participation at Sandee & Amelie steampunk challenges
Coutureuse
What a awsome tophat!
ReplyDeleteOK, I need to be able to wear that - like, right now! :) That is SO awesome, I love it!
ReplyDeleteThank you for joining our challenge at SASPC!
Agnieszka
I love your creativity! You have also done a great job with this tutorial! Inspirational!
ReplyDelete